How to Design an Interactive Webinar in 6 Easy Steps
Learn how to make a webinar interactive with real audience engagement. Follow six easy steps to boost webinar interaction, connection, and results.


Ever hosted a webinar and felt like you were talking to an empty room? Cameras off, chat silent, audience multitasking like pros? We’ve all been there.
A truly interactive webinar feels different. People respond, the chat lights up, and your ideas actually land. Whether you’re a coach, trainer, or marketer, interaction is what turns viewers into participants, and participants into fans (or customers who actually stick around).
Here’s exactly how to make your next webinar interactive, step by step, so it feels less like a broadcast and more like a vibrant conversation.
Step 1: Know Your Audience and Define Engagement Goals
Before you design slides or choose a platform, stop and ask: Who’s in the room, and what do they want from you?
A webinar for corporate trainers feels different from one for small business owners or teachers. Each group interacts differently. Some love live polls, others prefer typing quiet questions in chat. Knowing your audience helps you design engagement that fits their comfort zone.
Then, set clear engagement goals. What kind of webinar interaction are you aiming for? 50% chat participation? A live poll every 10 minutes? A quiz at the end? Define what “interactive” means for your session, and plan around it.
Because here’s the secret: Keeping attention is a small part of interactive webinars. You actually want to help your audience connect, remember, and take action on what you’re sharing.
Step 2: Plan Your Interaction Moments
Every great interactive webinar has rhythm: a balance of listening, responding, and participating. Think of your session as a conversation, not a lecture.
Map out where you’ll invite your audience. A quick poll in the first five minutes (“Where are you tuning in from?”) wakes people up and breaks the ice. Midway through, drop a question in chat or run a short quiz to check comprehension. End with a word cloud or open Q&A to gather insights and spark discussion.
Plan these touchpoints before you build your deck. Each one should have a purpose, e.g., to gather data, surface opinions, test knowledge, or just re-energize the room. That way, your audience co-creates the experience with you.
Step 3: Design an Interactive Webinar Deck
Your slides are the stage for your webinar interaction, so make them work for you, not against you. Think less “PowerPoint wall of text” and more “visual rhythm.”
Alternate between content and engagement: one slide for teaching, the next for a poll, prompt, or question. Keep text light, visuals bold, and pacing quick. A new slide every 45-60 seconds keeps eyes on screen and minds engaged.
Add visuals that invite reaction, like emoji check-ins, short agree/disagree prompts, even memes if your crowd can take a joke. You’re guiding a conversation, and your deck should reflect that.
Pro Tip: Don’t build for your audience, build with them. Each click forward should make them do something, not just see something.
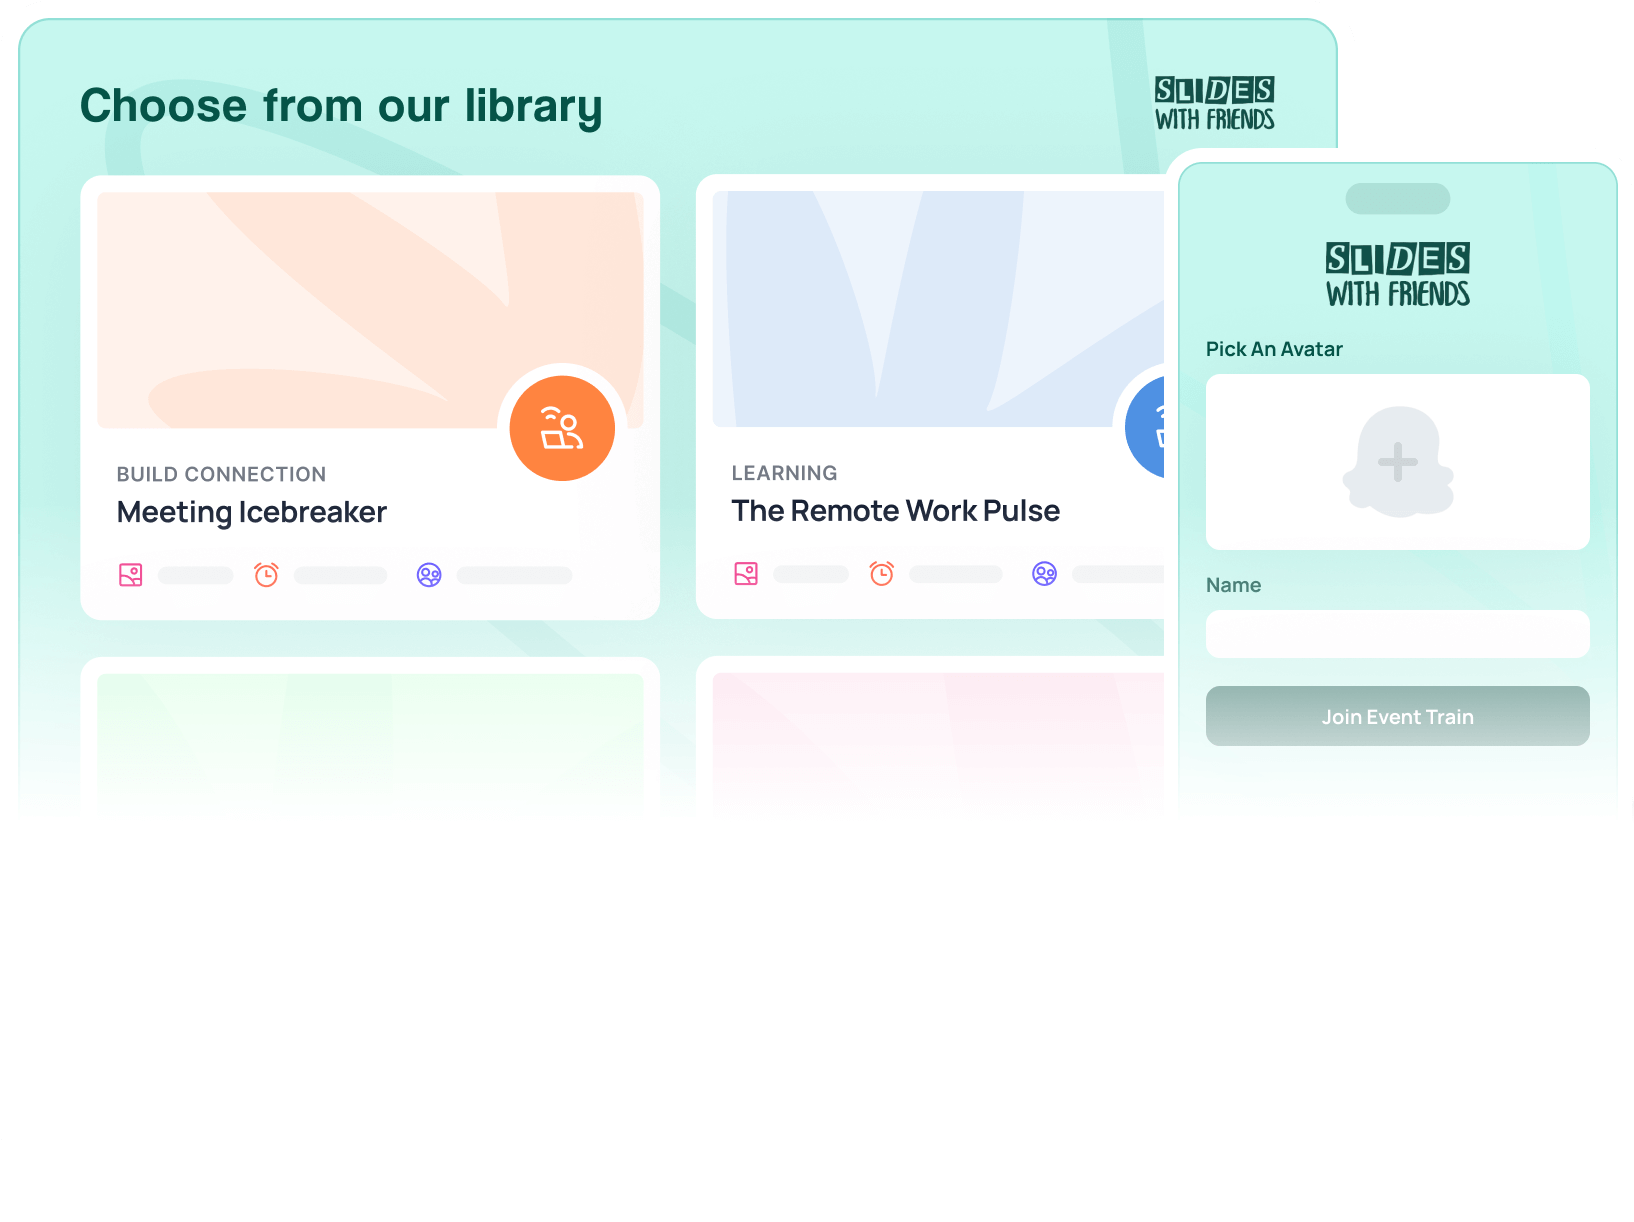
Step 4: Choose the Right Tools for an Interactive Webinar
You’ve got your content and your engagement plan, now you need the tech to make it happen. The best tools for interactive webinars make participation effortless for your audience and stress-free for you.
If your platform supports built-in live polls, breakout rooms, or chat reactions (hello Zoom, Teams, and Google Meet), use them. Then, level up with add-ons that turn your slides into live interaction points.
Tools like Slides With Friends, Slido, or Mentimeter let you add polls, quizzes, and word clouds directly into your presentation. Your audience joins via QR code or link, no downloads, no tech chaos. Suddenly, you’re hosting a two-way event that people remember.
Whatever tools you pick, test them beforehand. The most engaging webinar in the world still falls flat if your poll link doesn’t work.
Step 5: Deliver With Energy and Real-Time Interaction
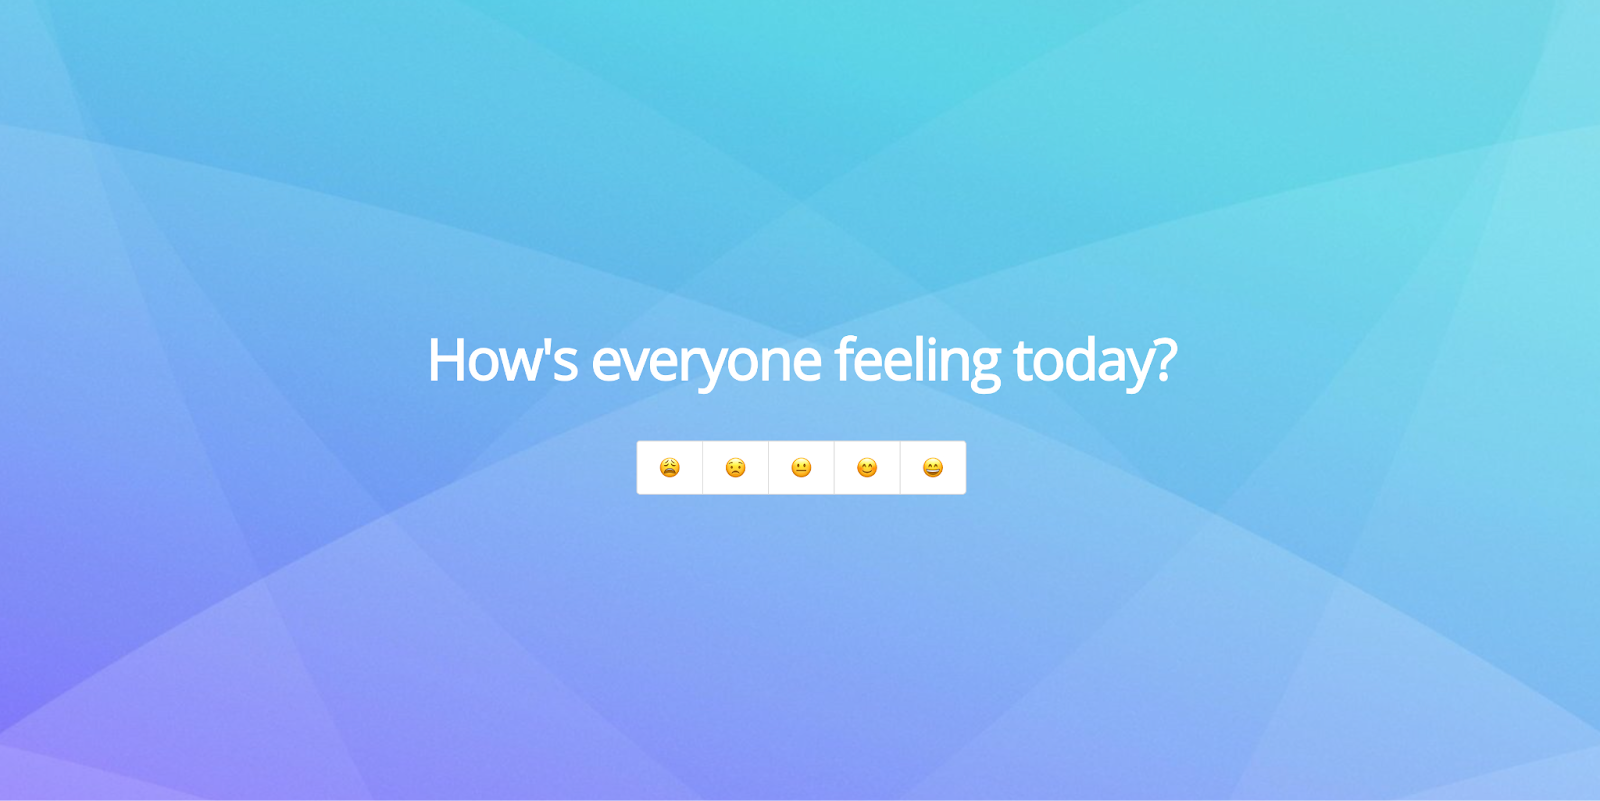
Now it’s showtime! Start strong with a warm welcome or quick icebreaker (“Drop one emoji that shows how your day’s going!”). Keep your energy conversational; your enthusiasm sets the tone for participation. Then, weave in your planned interactions.
Don’t fear pauses. Silence after a question isn’t always failure. Your audience is probably thinking. Wait, smile, and acknowledge responses as they roll in. Each real-time interaction makes people feel seen, and that’s what keeps them from tuning out.
Step 6: Follow Up to Keep Engagement Alive
Your webinar doesn’t end when you hit “Leave Meeting.” The most effective interactive webinars keep the conversation alive long after the cameras switch off.
Send a quick thank-you email with takeaways, resources, and answers to any leftover questions. Add a short post-event survey. Ask what people loved and where they zoned out (it’s gold for improving next time).
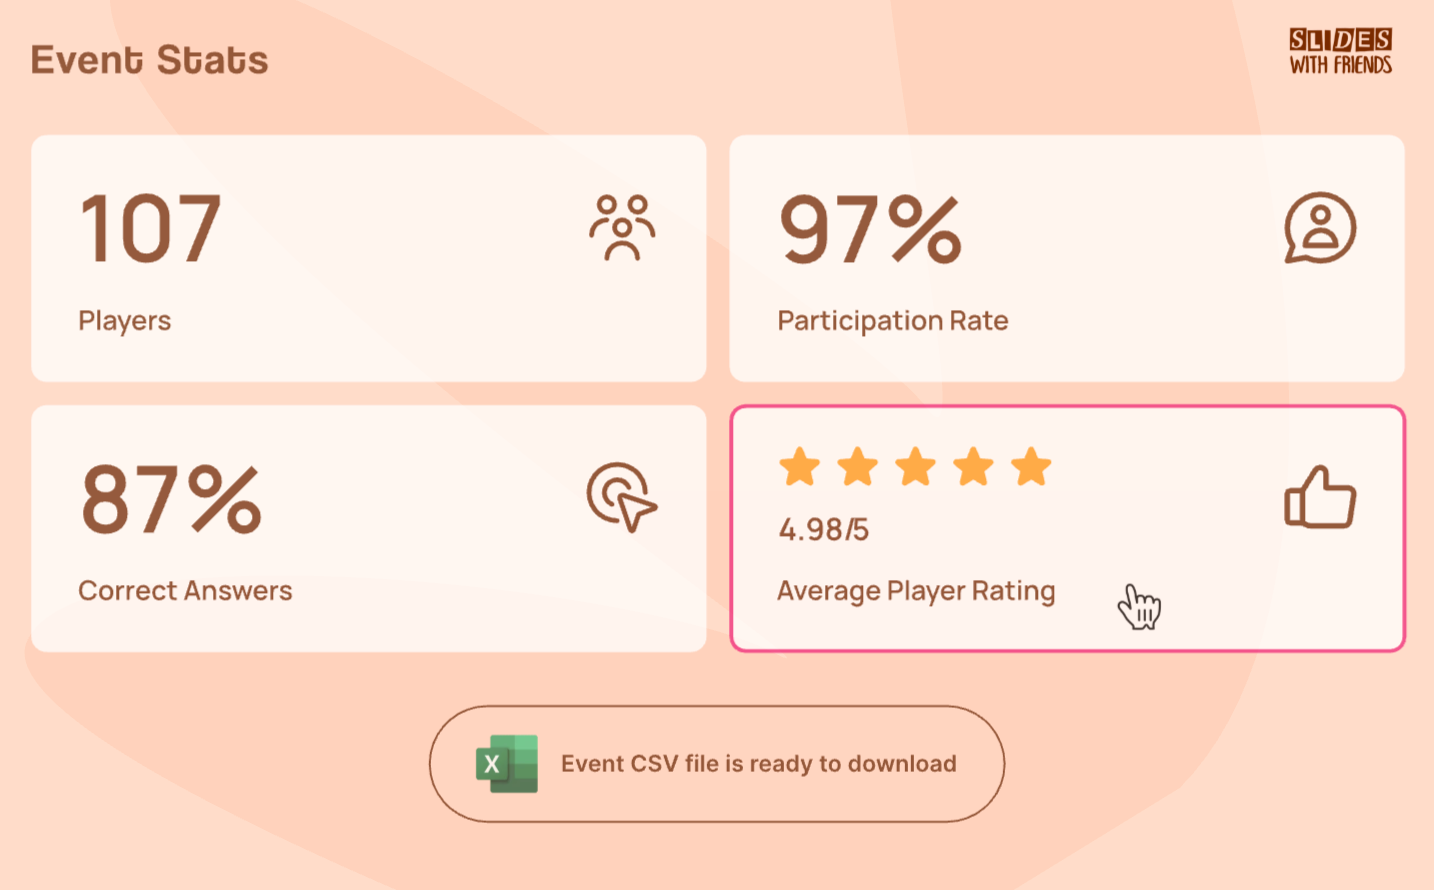
If you used tools like Slides With Friends, export the results and share a fun recap like the top quiz scorer, the most popular word from your cloud, or the best audience question. That small follow-up turns a one-time event into an ongoing relationship, which is the real win.
In a Nutshell…
Gimmicks don’t make an interactive webinar. Connection does. When you plan for engagement from the start, design with your audience in mind, and use the right mix of tools, your session stops feeling like a broadcast and starts feeling like a shared experience.


More related articles


Ready to ditch the dull, and run team sessions that people will actually enjoy?
Get started with a Slides with Friends deck in no time. We’ve got all the interactive features you need in one easy-to-learn, easy-to-set-up tool.